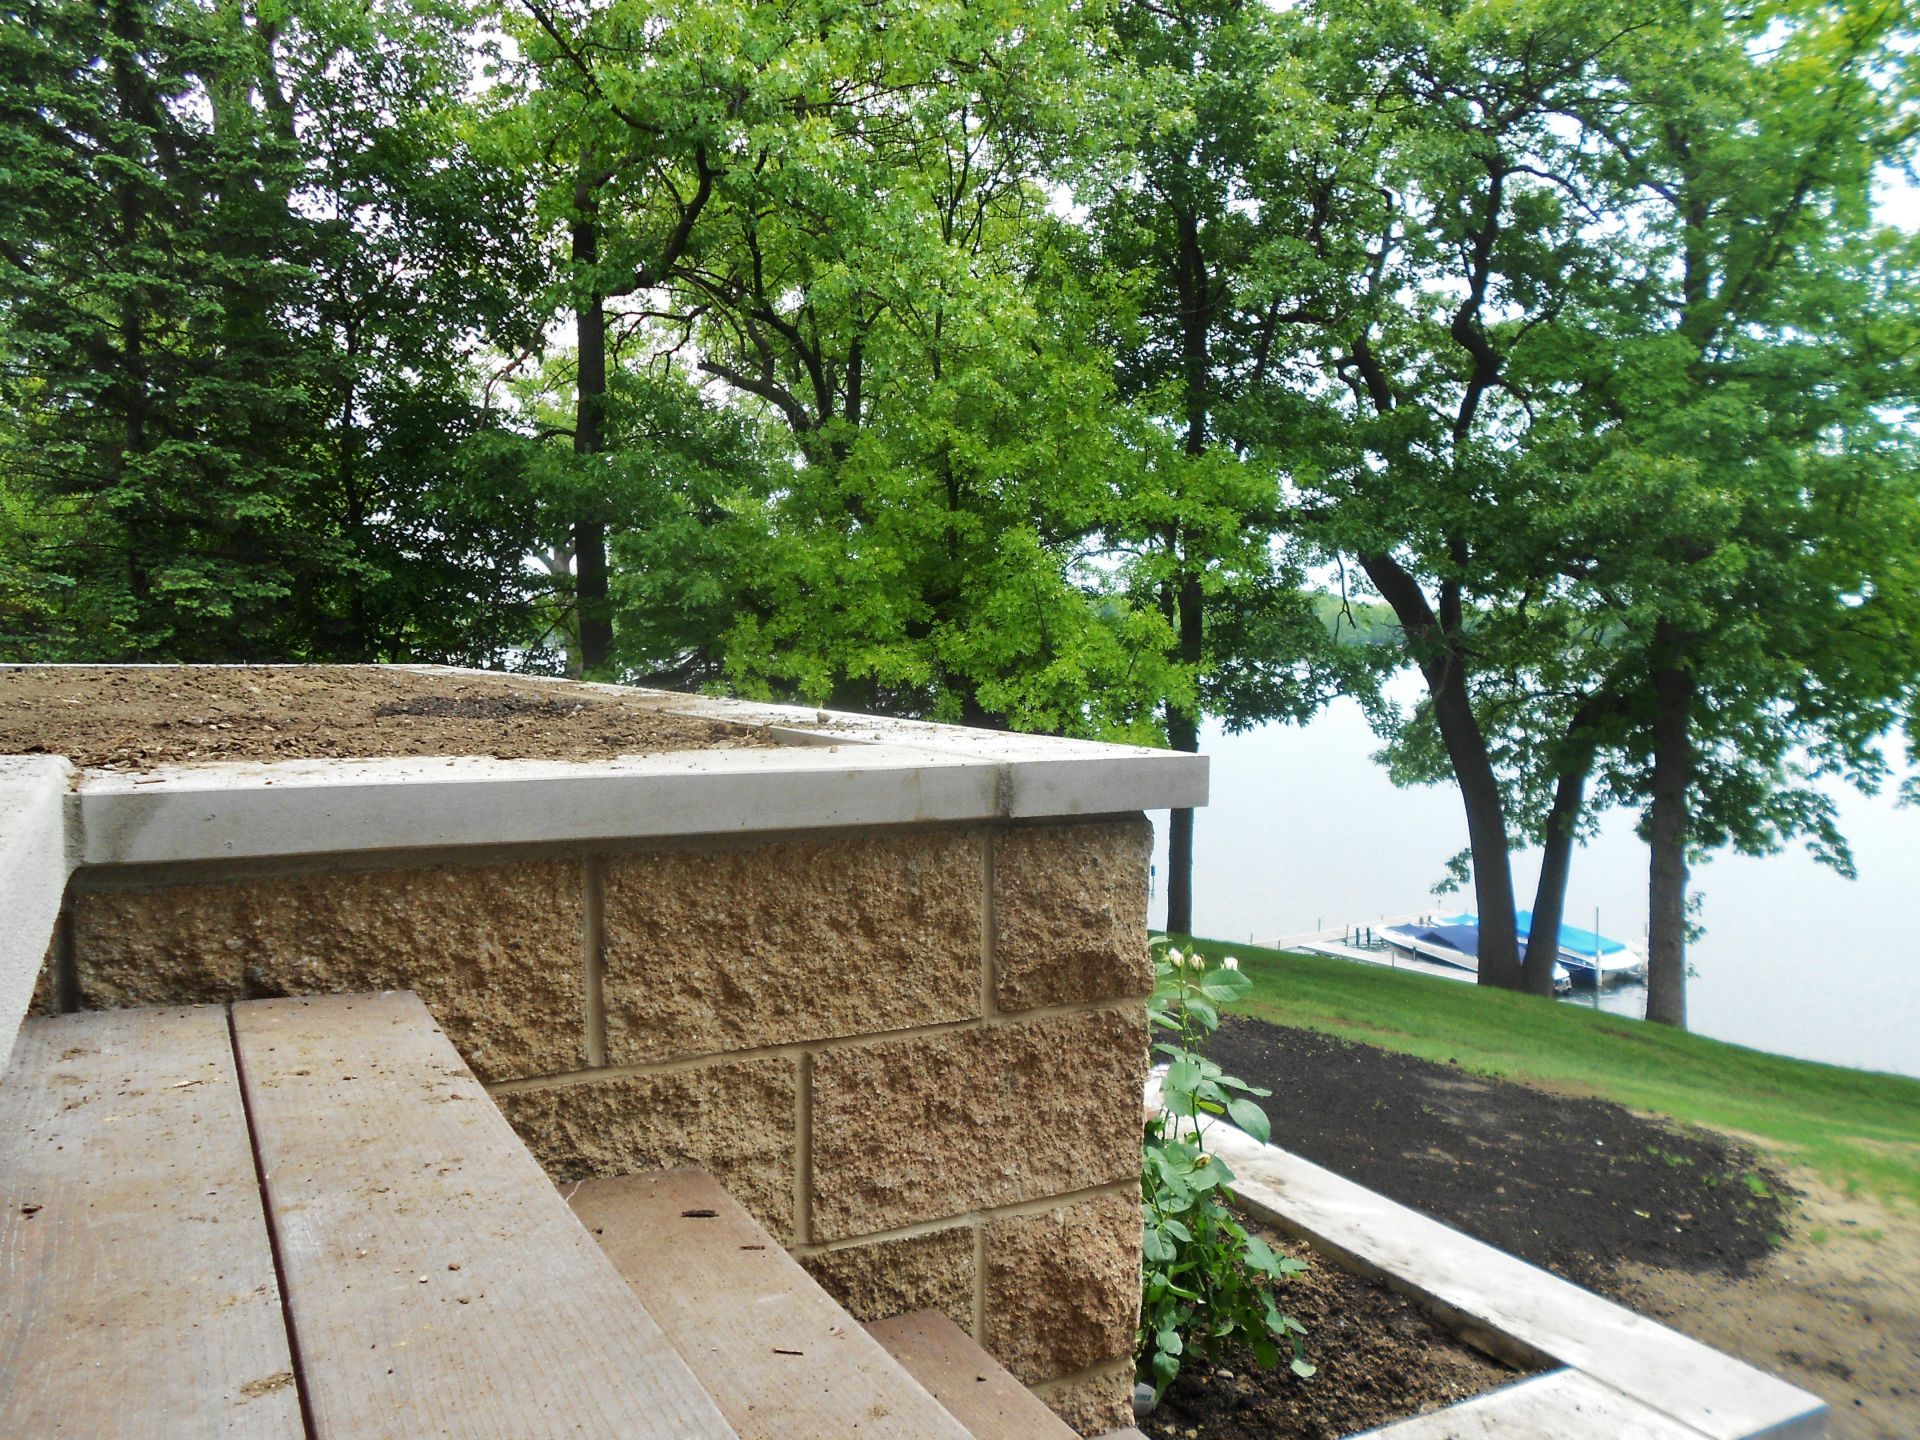
A view from the top level of the three tiered retaining wall that is over looking the lake.
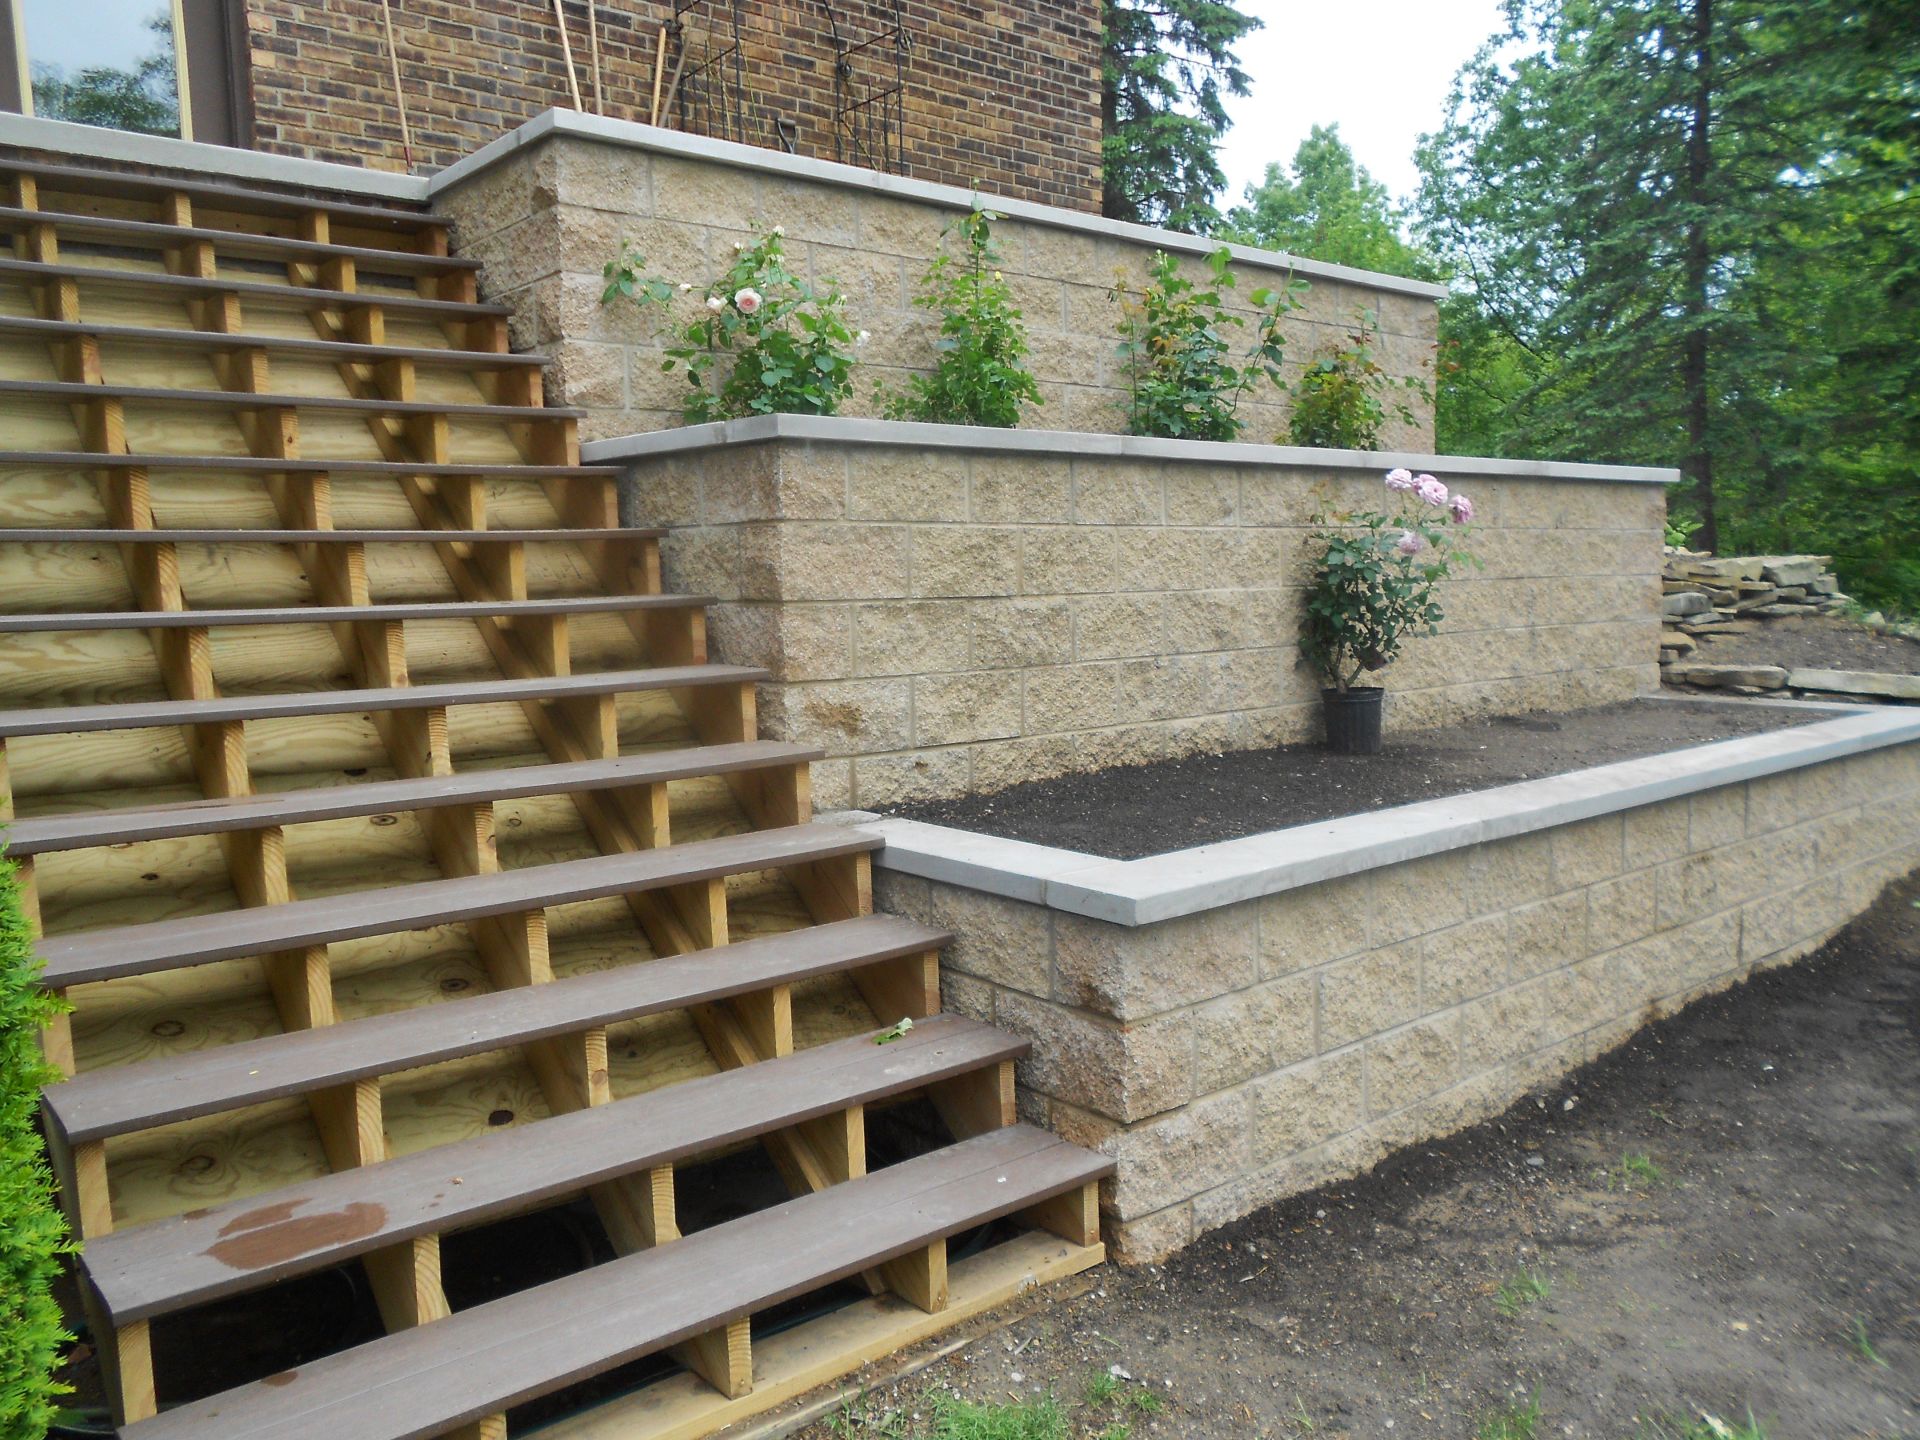
The three tiered retaining wall is also accompanied by new Azek steps.
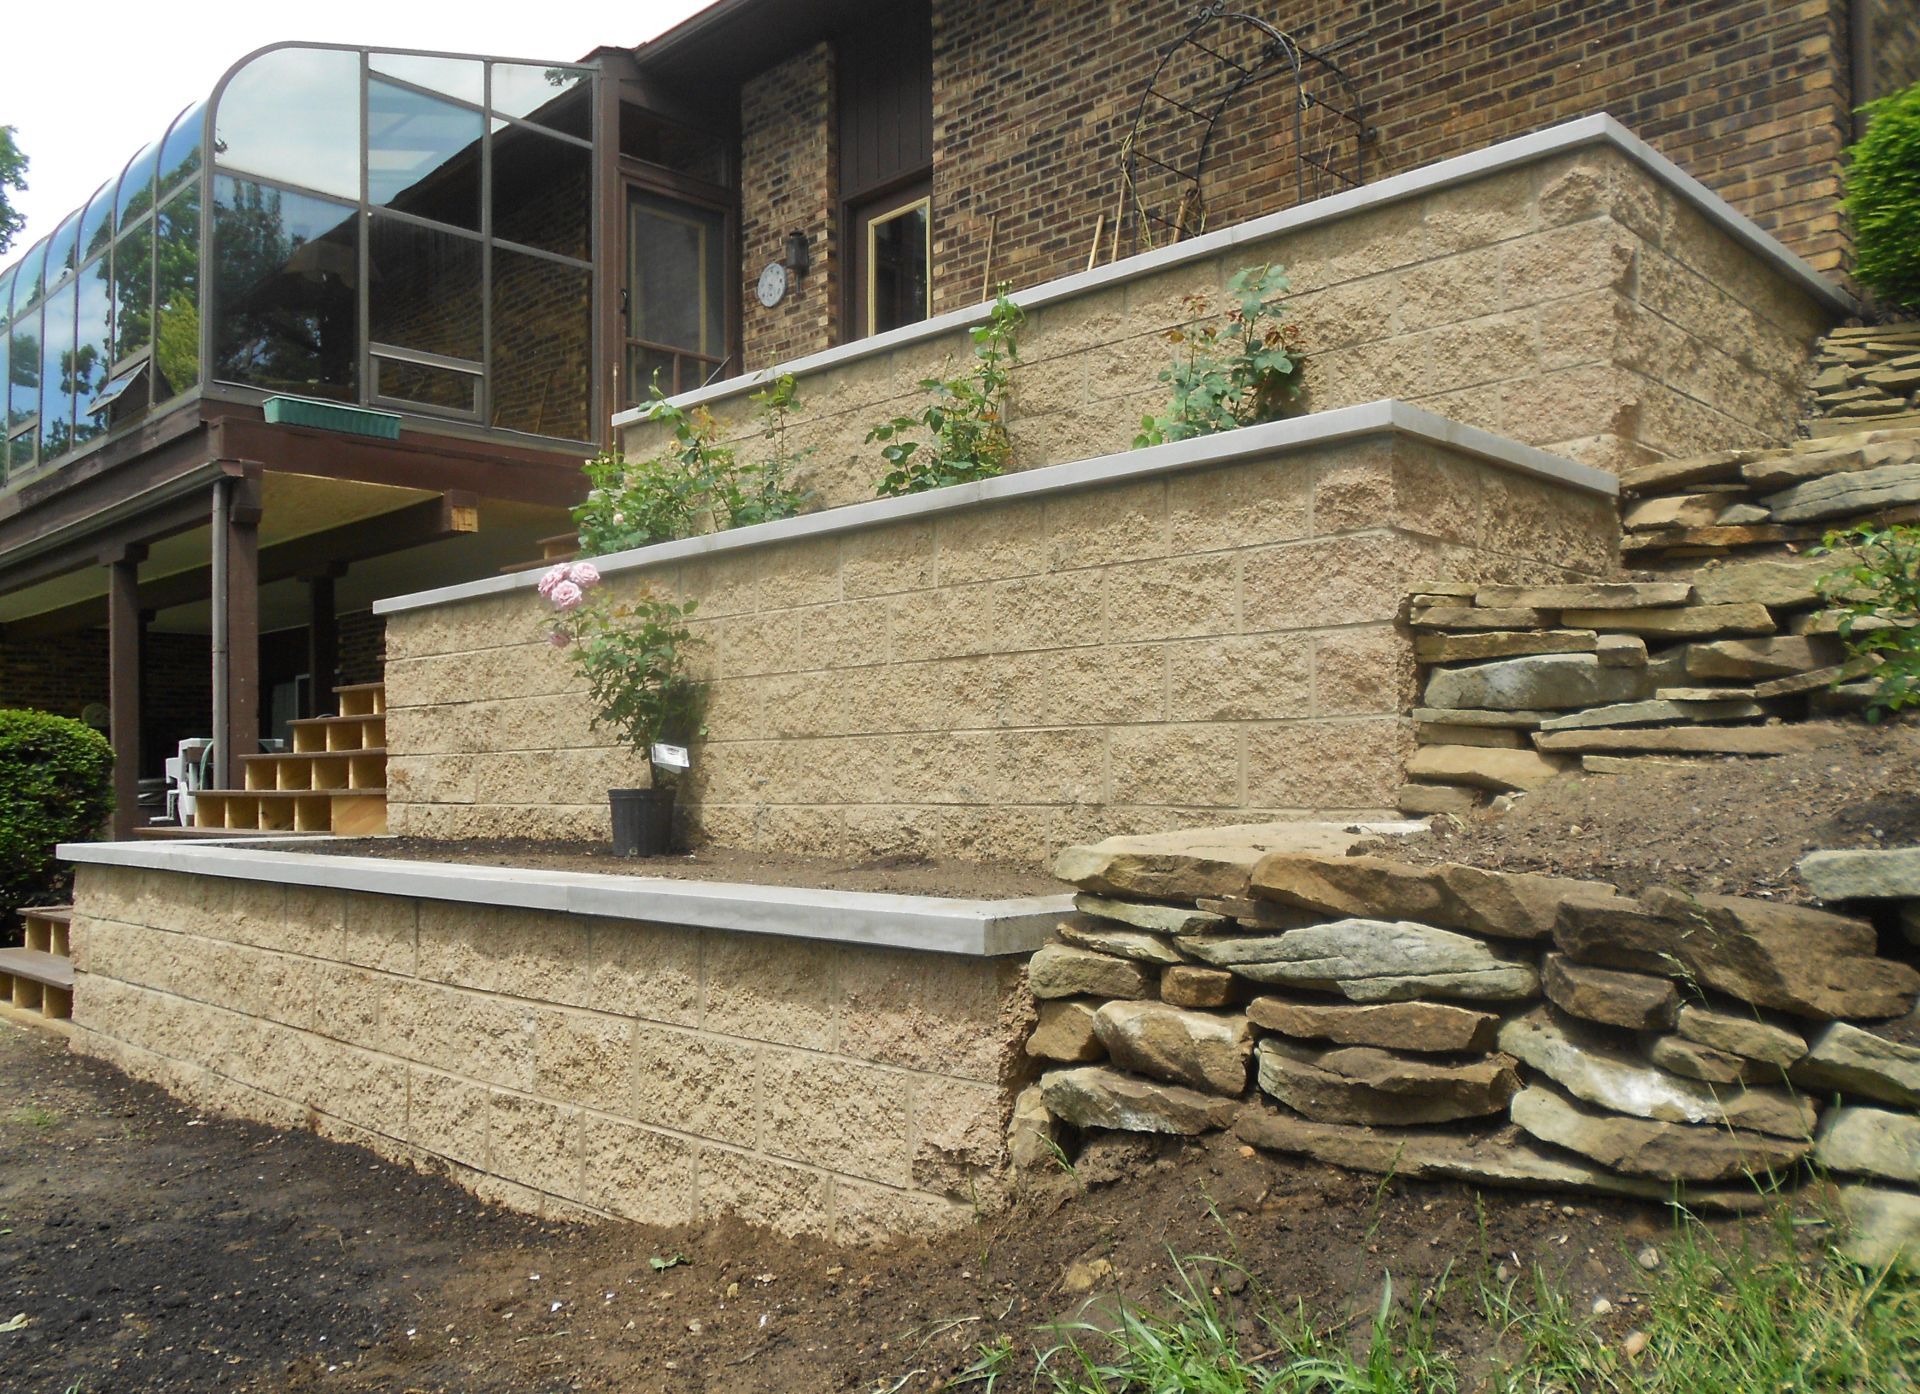
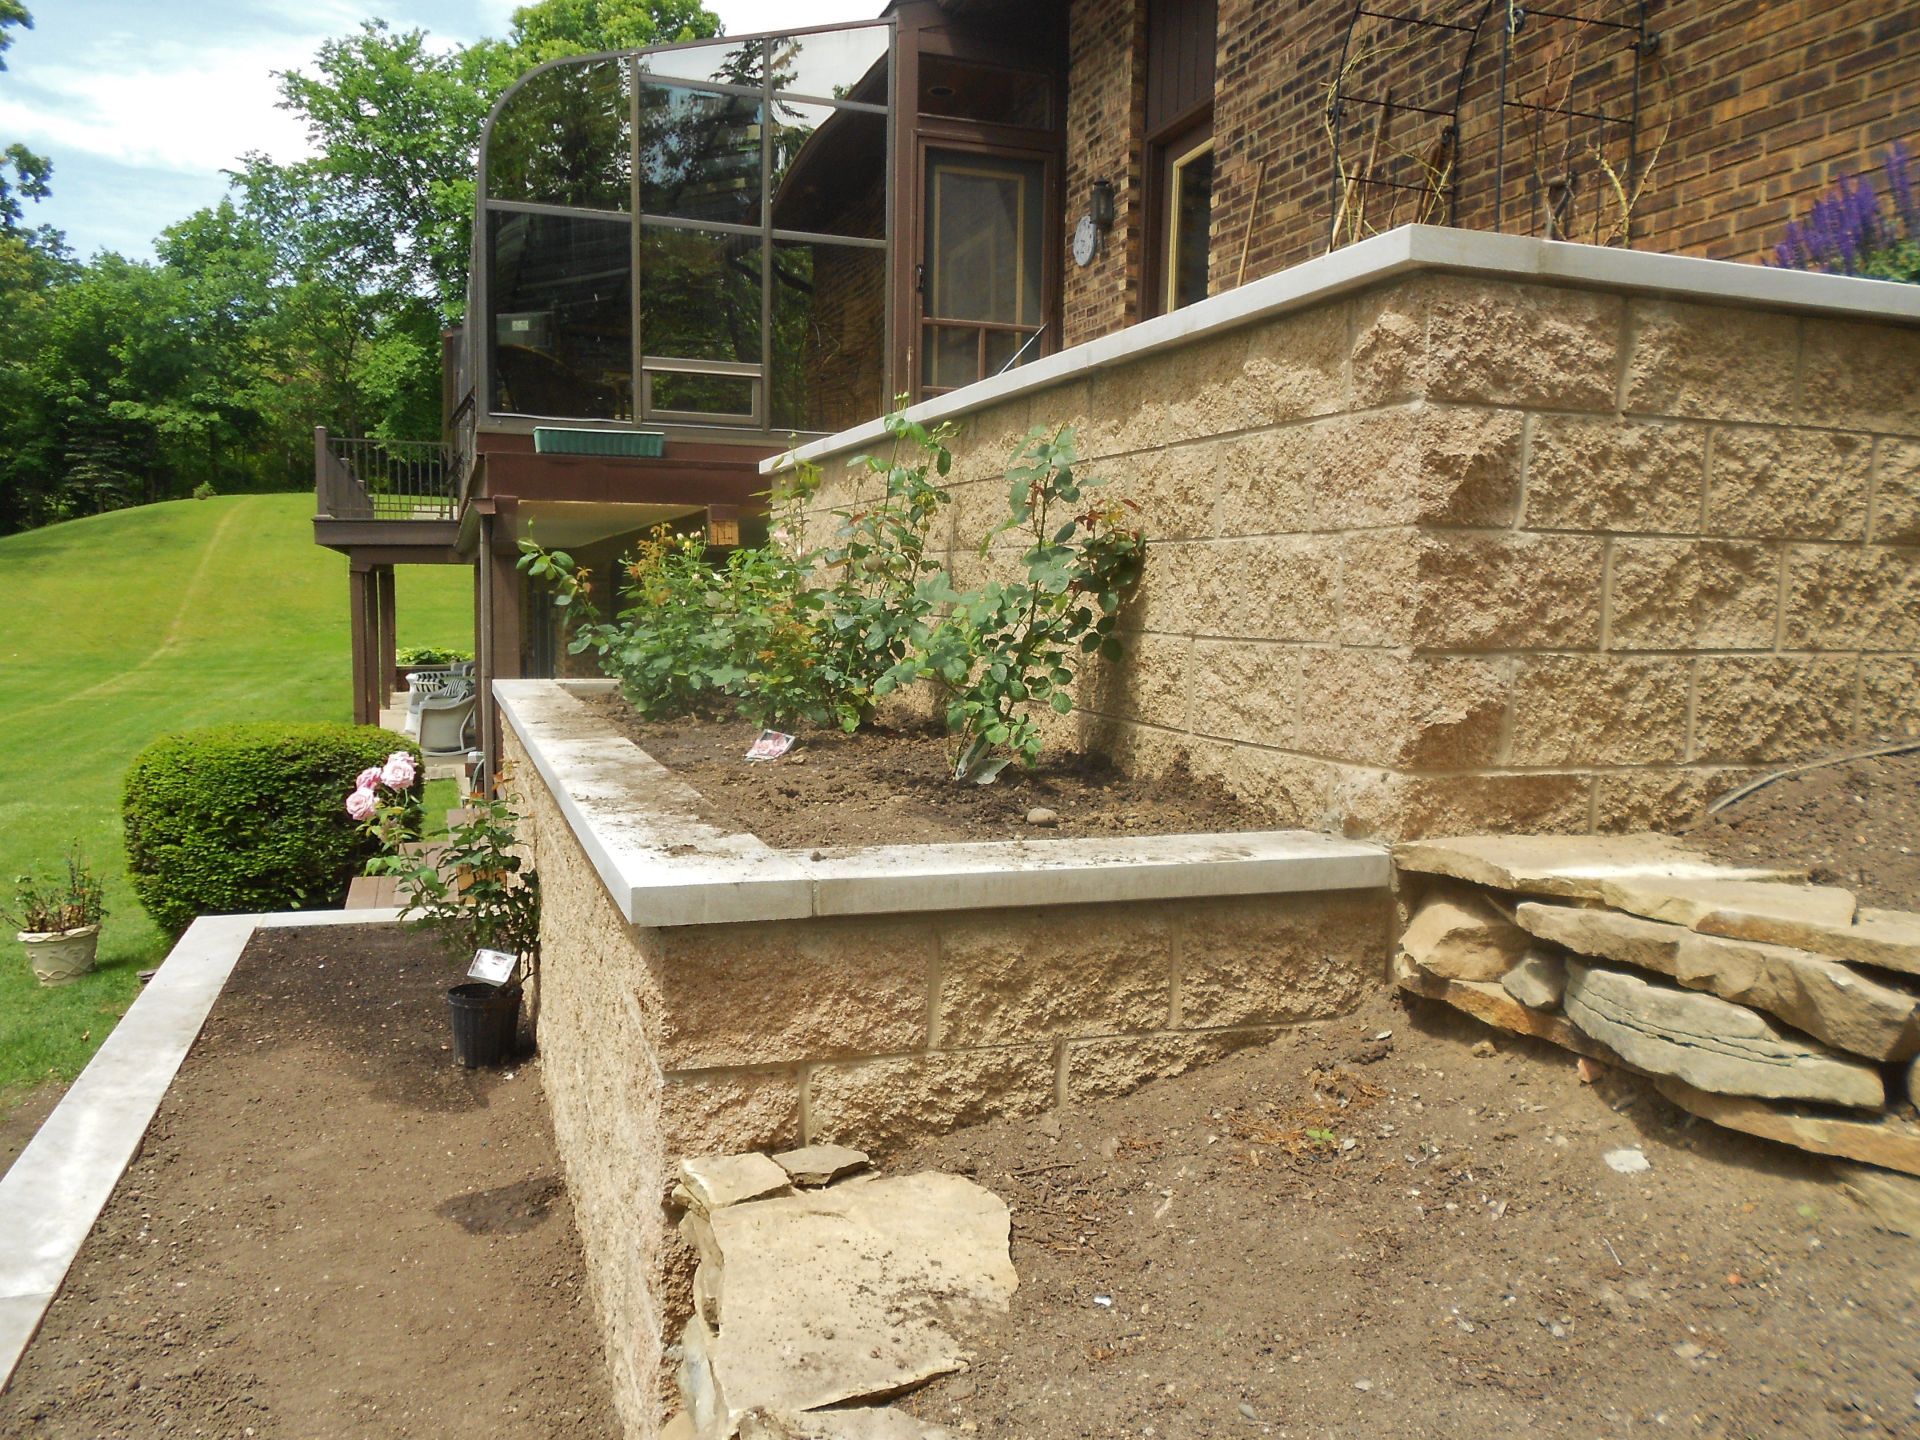
The split faced block and limestone cap retaining wall replaced an existing wood a rotting wood retaining wall.
The limestone caps and split faced block of the retaining wall complement the existing brick home.
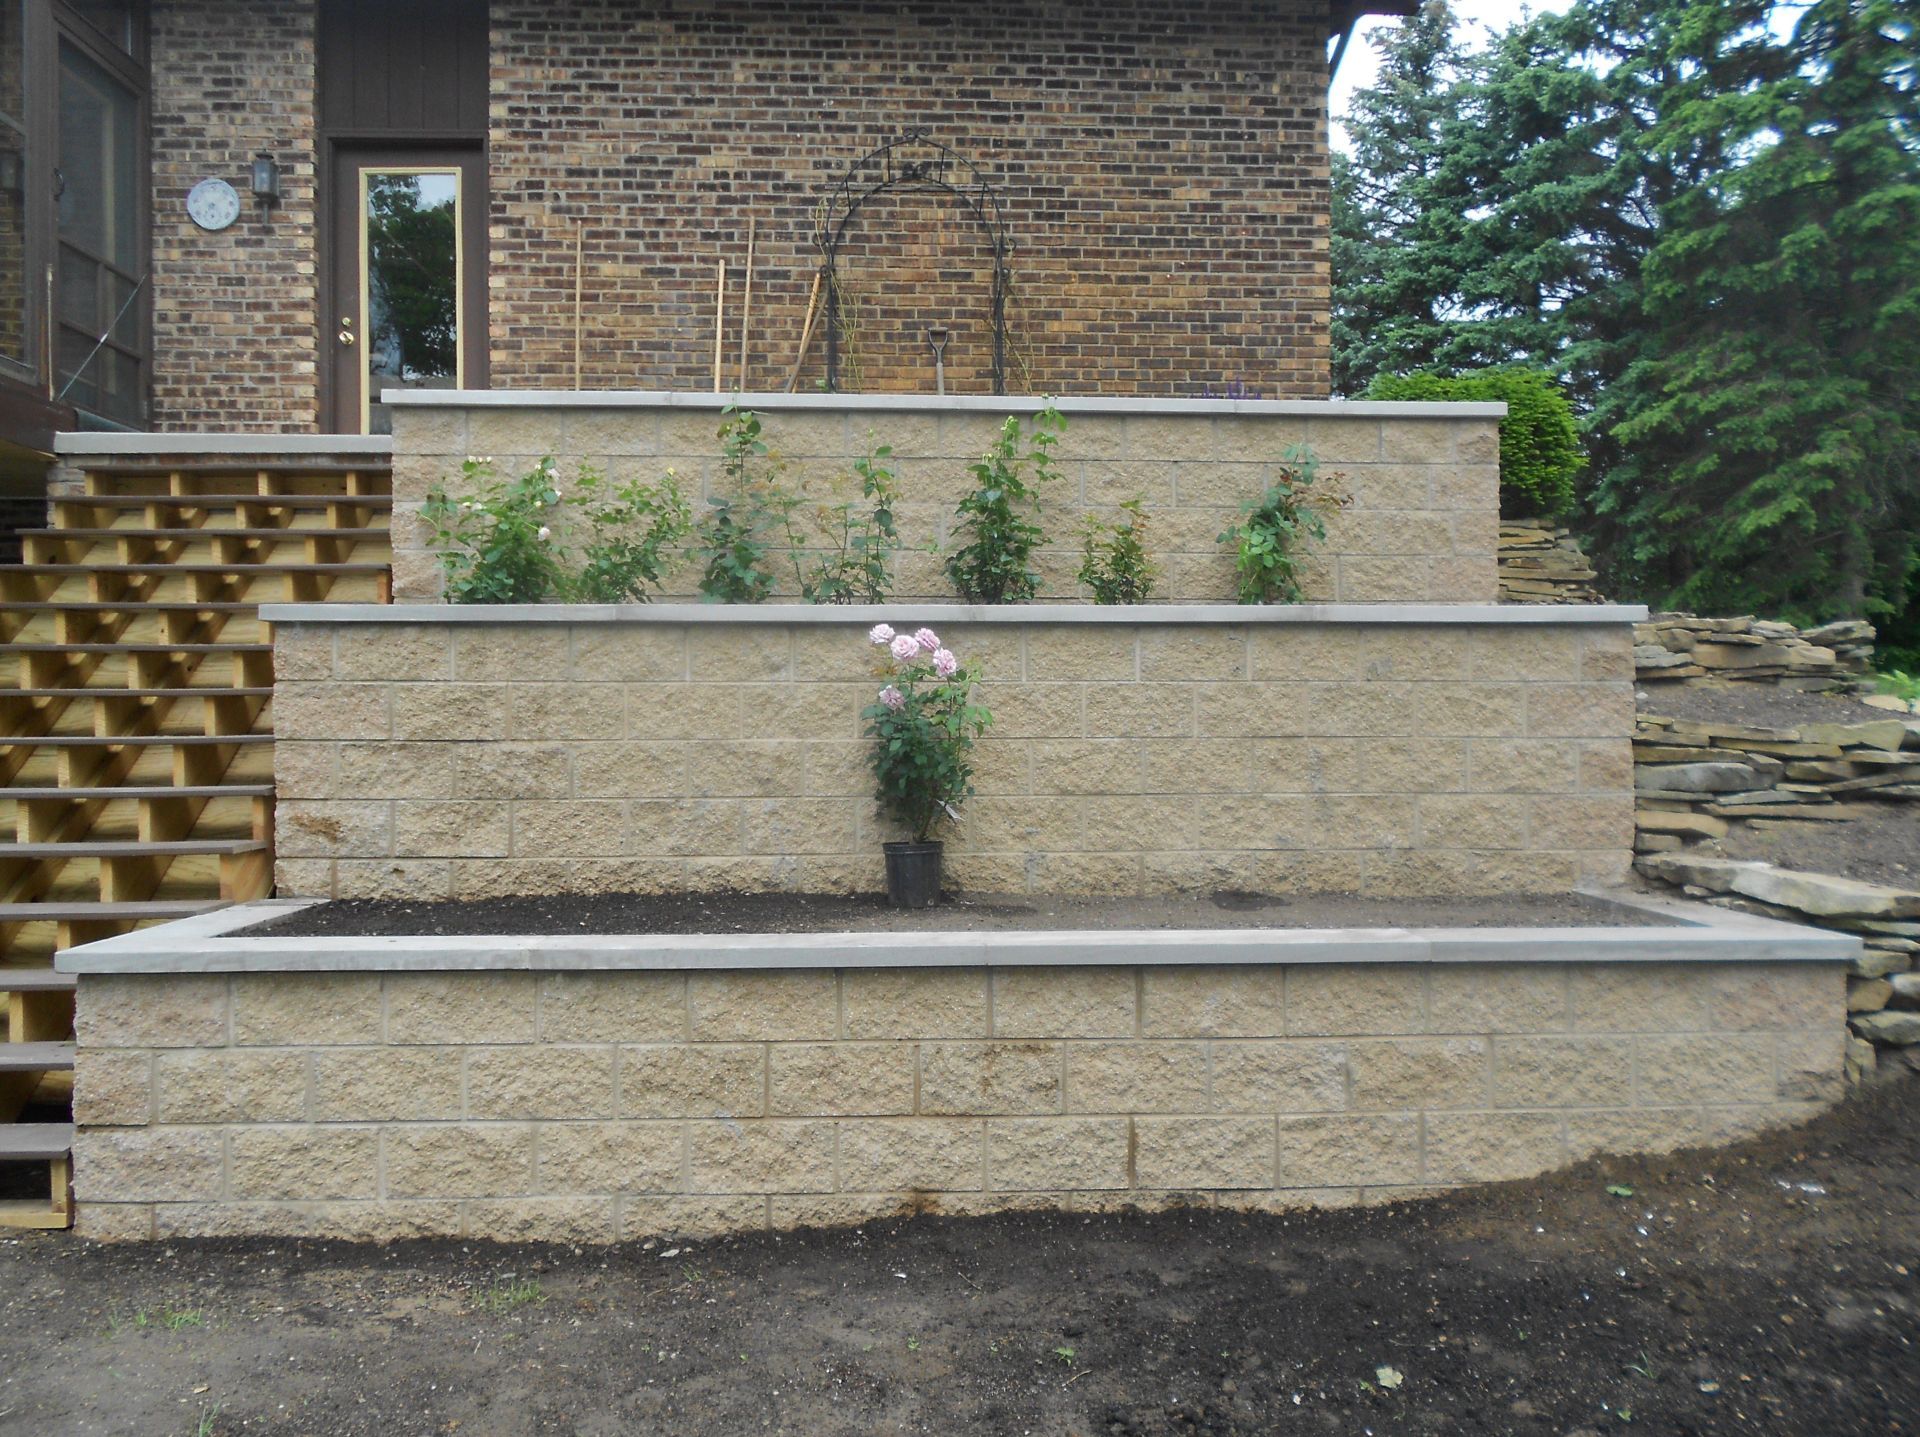
A closer look at our three tiered retaining wall.
Dexter Block
13600 Luick Dr, Chelsea, MI 48118
Privacy Policy | Sitemap